Rapid Prototyping: Parse and Vue
Check out our new guide on web scraping!
This guide is the first part in a series on rapid software development. In this tutorial, we create a Vue application that utilizes the Parse SDK. Specifically, we’ll focus on authorization / authentication and developing a sign in page that uses Parse’s login call. We’ll also use the Bootstrap stylesheet. With this workflow, you can have the skeleton of a working application in 30 minutes. More impressively, you can scale very elegantly as the app grows.
Background
Parse
I highly recommend using the Parse Framework for quickly developing an MVP or proof-of-concept. It is very amenable to working swiftly for three reasons:
- Out-of-the-box functionality for frontend data manipulation
- Intuitive Role-based Access Control
- Great options for local development, deployment, and continuous integration
Vue
Vue needs less of an introduction than Parse. For one thing, it is immensely popular, garnering well over a hundred thousand stars on Github (eding out React at the time of writing).
Crucially, Vue strives to be “incrementally adoptable”, an ideal ingredient for rapid prototyping. You can “drop in” the Vue CDN link into your html, write about 4 lines of app initialization code, and already tap into its robust API. This is a welcome break from most other frontend frameworks that require a complex toolchain and setup. Best of all, you can easily refactor your project to integrate with Webpack, Vuex, the VueCLI and other tools, when you’re ready to scale up your app.
We will also include the Vue Router. The Vue Router is a powerful tool that allows you to map URLs to views, something that’s often done on the server. By using Vue Router, our code doesn’t refresh when navigating within the app.
Just show me the code
This guide will implement a Parse/Vue login application step-by-step. If you’re the type of person who just wants to dig through the code, I’ve added it as a repository here. Each step has its own commit, so you can peruse a snapshot with:
$ git checkout [commit-hash]Remember, you can see all commit-hash’s with
$ git log
Prerequisite
Parse Server
The main prereq to this project is a running Parse Server. Fear not, Back4App allows you to provision a Parse Server very quickly on their cloud. They are free for a reasonable number of http requests, plenty for what we’re trying to get out the door.
Go to the Back4App website and create an account. Then, on your dashboard, create a new Application. After a couple of seconds of loading, you should be able to grab your application keys. On your new app’s dashboard, click “App Settings”, then “Security & Keys”. We’re going to grab the Javascript Key, and the Application ID. Make sure to have these handy.
I’ve glossed over setting up a Back4App application as it should be pretty straightforward. If you are having trouble, check out their getting started guide.
You may also create your own Parse Server on your localhost instead. That is outside the scope of this project, but the concept is the same: run your server and grab your keys.
Serving Static HTML
As you might know, you may open an HTML file directly with your browser. However, in order that AJAX requests work, the file must transmitted via a server. In this guide, we will employ a localhost server once our code begins making HTTP requests (when we start logging in to our app).
I personally use php to serve HTML files from mac / unix command line in these situations. The command is
$ # this serves directory on port 3100
$ php -S localhost:3100
I will use the PHP dev web server for this tutorial.
For this to work, you must have PHP installed on your operating system. You can test so with the following command:
$ # should return a path to PHP. If not, php is not installed
$ which php
On MacOS, it is installed out of the box, and on unix systems it takes just a couple of commands: https://thishosting.rocks/install-php-on-ubuntu/
You are welcome to use anything that will serve markup locally! This includes node / express, python etc. A little bit of google-searching will yield straightforward guides for any setup.
If you don’t know how to serve files & PHP is not installed, consider using XAMPP. Installation is simple, and running uses a GUI. Here’s a good getting started guide.
Getting Started
All we need is a simple index.html. That’s it. We’re going to include the CDN links to Vue, Vue Router, Parse, and Bootstrap.
<!DOCTYPE html>
<html>
  <head>
    <meta charset="UTF-8" />
    <meta name="viewport" content="width=device-width,initial-scale=1" />
    <title>My Application</title>
    <link
      rel="stylesheet"
      href="https://stackpath.bootstrapcdn.com/bootstrap/4.1.3/css/bootstrap.min.css"
      integrity="sha384-MCw98/SFnGE8fJT3GXwEOngsV7Zt27NXFoaoApmYm81iuXoPkFOJwJ8ERdknLPMO"
      crossorigin="anonymous"
    />
  </head>
  <body>
    <script src="https://cdn.jsdelivr.net/npm/vue/dist/vue.js"></script>
    <script src="https://cdnjs.cloudflare.com/ajax/libs/parse/2.0.1/parse.min.js"></script>
    <script src="https://unpkg.com/vue-router/dist/vue-router.js"></script>
  </body>
</html>
Step 1: Parse Initialization
You can look at step 1 completed source code here.
Now, let’s add a single .js file for our code. In future iterations we’d refactor this into a couple of different files, but we’re going for speed here.
$ mkdir js
$ touch js/app.js
Include the js file in your index.html below the CDN links for Vue and Parse:
<!DOCTYPE html>
<html>
  <head>
    <meta charset="UTF-8" />
    <meta name="viewport" content="width=device-width,initial-scale=1" />
    <title>My Application</title>
    <link
      rel="stylesheet"
      href="https://stackpath.bootstrapcdn.com/bootstrap/4.1.3/css/bootstrap.min.css"
      integrity="sha384-MCw98/SFnGE8fJT3GXwEOngsV7Zt27NXFoaoApmYm81iuXoPkFOJwJ8ERdknLPMO"
      crossorigin="anonymous"
    />
  </head>
  <body>
    <script src="https://cdn.jsdelivr.net/npm/vue/dist/vue.js"></script>
    <script src="https://cdnjs.cloudflare.com/ajax/libs/parse/2.0.1/parse.min.js"></script>
    <script src="https://unpkg.com/vue-router/dist/vue-router.js"></script>
    <script src="js/app.js"></script>
  </body>
</html>
Finally, let’s initialize our Parse app. We’re going to need those keys you grabbed in the prereqs. Your app.js should look like this:
// Your corresponding keys
Parse.initialize('YOUR_APP_ID', 'YOUR_JAVASCRIPT_KEY')

// For back4app applications, this url is
// 'https://parseapi.back4app.com'
Parse.serverURL = 'YOUR_SERVER_URL'
Optional: Test Parse Connection
If you want to confirm your Parse connection is configured properly, you can add the following code at the bottom of your app.js:
// Parse initialization above
new Parse.Object('Test', { text: 'testing' })
  .save()
  .then(function (obj) {
    console.log('Success', obj)
  })
  .catch(function (e) {
    alert('Error saving test object!' + e.message)
  })
Since this is using an AJAX request, you will have to open the file with a server:
$ php -S localhost:3100
$ # navigate to http://localhost:3100/index.html
After loading the page, make sure you don’t have an error alert -you should see a success message in your console. When you see it’s working, make sure to remove this snippet.
Step 2: Simple Login View
You can find the step 2 completed source code here.
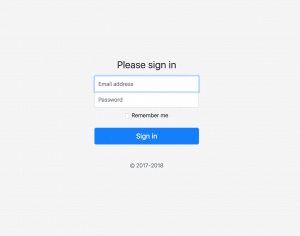
Before we turn this into a Vue app, let’s create a sign in page that will quickly be refactored into our login component. So as not to reinvent the wheel, I will borrow a Bootstrap example template. I merely added a wrapper to the form, and applied some styling to the wrapper that was previously applied to the body tag (this will make things easier to refactor). I also removed the logo.
For now, create a login.html and a css/signin.css
$ touch login.html
$ mkdir css
$ touch css/signin.css
Paste the following into your login.html:
<!DOCTYPE html>
<html>
  <head>
    <meta charset="UTF-8" />
    <meta name="viewport" content="width=device-width,initial-scale=1" />
    <title>My Login</title>
    <link
      rel="stylesheet"
      href="https://stackpath.bootstrapcdn.com/bootstrap/4.1.3/css/bootstrap.min.css"
      integrity="sha384-MCw98/SFnGE8fJT3GXwEOngsV7Zt27NXFoaoApmYm81iuXoPkFOJwJ8ERdknLPMO"
      crossorigin="anonymous"
    />
    <link rel="stylesheet" href="css/signin.css" />
  </head>

  <body>
    <div class="signin-wrapper text-center">
      <form class="form-signin">
        <h1 class="h3 font-weight-normal mb-3">Please sign in</h1>
        <label for="inputEmail" class="sr-only">Email address</label>
        <input
          type="email"
          id="inputEmail"
          class="form-control"
          placeholder="Email address"
          required=""
          autofocus=""
        />
        <label for="inputPassword" class="sr-only">Password</label>
        <input
          type="password"
          id="inputPassword"
          class="form-control"
          placeholder="Password"
          required=""
        />
        <button class="btn btn-lg btn-primary btn-block" type="submit">
          Sign in
        </button>
        <p class="text-muted mb-3 mt-5">© 2017-2018</p>
      </form>
    </div>
  </body>
</html>
And this into your signin.css:
html,
body,
#app {
  height: 100%;
}

.signin-wrapper {
  height: 100%;
  display: -ms-flexbox;
  display: flex;
  -ms-flex-align: center;
  align-items: center;
  padding-top: 40px;
  padding-bottom: 40px;
  background-color: #f5f5f5;
}

.form-signin {
  width: 100%;
  max-width: 330px;
  padding: 15px;
  margin: auto;
}
.form-signin .checkbox {
  font-weight: 400;
}
.form-signin .form-control {
  position: relative;
  box-sizing: border-box;
  height: auto;
  padding: 10px;
  font-size: 16px;
}
.form-signin .form-control:focus {
  z-index: 2;
}
.form-signin input[type='email'] {
  margin-bottom: -1px;
  border-bottom-right-radius: 0;
  border-bottom-left-radius: 0;
}
.form-signin input[type='password'] {
  margin-bottom: 10px;
  border-top-left-radius: 0;
  border-top-right-radius: 0;
}
If you open login.html with your browser, it should resemble a nice enough login view:
Step 3: Vue Initialization
You can find the step 3 completed source code here.
Here we initialize the Vue application, and mount it to the template. This necessitates some markup and some JavaScript. Start with the markup. Add the following node to the body (above your scripts):
<div id="app">
  <!-- route outlet -->
  <!-- component matched by the route will render here -->
</div>
And update app.js to contain Vue initialization code:
// Your corresponding keys
Parse.initialize('YOUR_APP_ID', 'YOUR_JAVASCRIPT_KEY')

// For back4app applications, this url is
// 'https://parseapi.back4app.com'
Parse.serverURL = 'YOUR_SERVER_URL'

const app = new Vue({}).$mount('#app')
That’s it! Vue and Parse are now initialized. We can start building our App now.
Step 4: Login Component
You can find the step 4 completed source code here.
Vue, like many frontend frameworks, utilizes components. Components contain functionality / markup that can be reused throughout your application. In practice it has proven to be a very powerful software pattern. For more information on Vue components, check out their docs.
Importantly, the Vue Router matches components to URLs, so a login component is a must to have a login page.
To convert the login markup to a login component, add the following code to the app.js file:
// Parse initialization above
Vue.component('login-component', {
  template:
    '<div class="signin-wrapper text-center"> \
    <form class="form-signin"> \
      <h1 class="h3 mb-3 font-weight-normal">Please sign in</h1> \
      <label for="inputEmail" class="sr-only">Email address</label> \
      <input type="email" id="inputEmail" class="form-control" placeholder="Email address" required="" autofocus=""> \
      <label for="inputPassword" class="sr-only">Password</label> \
      <input type="password" id="inputPassword" class="form-control" placeholder="Password" required=""> \
      <button class="btn btn-lg btn-primary btn-block" type="button">Sign in</button> \
      <p class="mt-5 mb-3 text-muted">© 2017-2018</p> \
    </form> \
  </div>',
})

// Vue initialization / mounting below
And then you can reference the component in the html like it is a native html element
<div id="app">
  <login-component></login-component>
</div>
I know, an escaped string is an ugly way to write markup. This is the price we must pay for creating an app with no build / bundling / cli of any sort. Trust me, this will be remedied down the road. For now, just bear with the template strings.
You should now be able to open your index.html file and see the same login form that we saw earlier
Step 5: Home Component
You can find the step 5 completed source code here.
Let’s create a very rudimentary home page so there is something to navigate to upon successful authentication. For now, we’ll settle for a “Hello World” that will be refactored into something functional shortly.
Add the following below your login-component:
// login component etc above
Vue.component('home-component', {
  template:
    '<div> \
    <h1> Hello World! </h1> \
    </div>',
})

// Vue initialization and mounting below
For good measure, I switched my markup to include the home component rather than the login component. This served to confirm that the component was declared correctly, and this will be changed in the next step anyway.
<div id="app">
  <home-component></home-component>
</div>
Open up index.html in your browser, and verify that you see a big “Hello World!”.
Step 6: Vue Router
You can find the step 6 completed source code here.
If you’ve created websites before, you know that different URLs map to different pages. Often the server is what determines what to send a browser given a particular URL. This can also be done in the client code, as we will do here. This is the basis for Single Page Webapplications; the entire application loads upon initial navigation, and subsequent URL changes (within the site) result in instantaneous view changes. The main takeaway is that there are no refreshes during navigation, and that the frontend figures out what to show based on a URL.
The Vue Router is the defacto way to accomplish routing in a Vue app. You’ll need to do assign the components to variables, map them to routes, initialize the router, and attach the router. This probably sounds much more complicated than it is. Here’s what the revised app.js will look like:
// Your corresponding keys
Parse.initialize('YOUR_APP_ID', 'YOUR_JAVASCRIPT_KEY')

// For back4app applications, this url is
// 'https://parseapi.back4app.com'
Parse.serverURL = 'YOUR_SERVER_URL'

// Assign LoginComponent
const LoginComponent = Vue.component('login-component', {
  template:
    '<div class="signin-wrapper text-center"> \
    <form class="form-signin"> \
      <h1 class="h3 mb-3 font-weight-normal">Please sign in</h1> \
      <label for="inputEmail" class="sr-only">Email address</label> \
      <input type="email" id="inputEmail" class="form-control" placeholder="Email address" required="" autofocus=""> \
      <label for="inputPassword" class="sr-only">Password</label> \
      <input type="password" id="inputPassword" class="form-control" placeholder="Password" required=""> \
      <button class="btn btn-lg btn-primary btn-block" type="button">Sign in</button> \
      <p class="mt-5 mb-3 text-muted">© 2017-2018</p> \
    </form> \
  </div>',
})

// Assign HomeComponent
const HomeComponent = Vue.component('home-component', {
  template:
    '<div> \
    <h1> Hello World! </h1> \
    </div>',
})
// Declare the route mapping
const routes = [
  { path: '/', component: HomeComponent },
  { path: '/login', component: LoginComponent },
]
// Initialize the router
const router = new VueRouter({
  routes, // short for `routes: routes`
})
// Attach the router to the vue instance
const app = new Vue({
  router,
}).$mount('#app')
Then bring up your markup, and swap out the hard-coded component for a router view and some links:
<!DOCTYPE html>
<html>
  <head>
    <meta charset="UTF-8" />
    <meta name="viewport" content="width=device-width,initial-scale=1" />
    <title>My Application</title>
    <link
      rel="stylesheet"
      href="https://stackpath.bootstrapcdn.com/bootstrap/4.1.3/css/bootstrap.min.css"
      integrity="sha384-MCw98/SFnGE8fJT3GXwEOngsV7Zt27NXFoaoApmYm81iuXoPkFOJwJ8ERdknLPMO"
      crossorigin="anonymous"
    />
    <link rel="stylesheet" href="css/signin.css" />
  </head>

  <body>
    <div id="app">
      <p>
        <!-- use router-link component for navigation. -->
        <!-- specify the link by passing the `to` prop. -->
        <!-- `<router-link>` will be rendered as an `<a>` tag by default -->
        <router-link to="/login">Go to Login</router-link>
        <router-link to="/">Go Home</router-link>
      </p>
      <router-view></router-view>
    </div>

    <script src="https://cdn.jsdelivr.net/npm/vue/dist/vue.js"></script>
    <script src="https://cdnjs.cloudflare.com/ajax/libs/parse/2.0.1/parse.min.js"></script>
    <script src="https://unpkg.com/vue-router/dist/vue-router.js"></script>
    <script src="js/app.js"></script>
  </body>
</html>
Two things of note here:
- the component corresponding to the active route will be rendered in the “router-view” tag’s place
- router-links appear as ‘a’ tags pointing to whatever’s passed in their “to” prop.
Step 7: Auth Call
You can find the step 7 completed source code here.
Here’s where Parse comes in. We’re going to add some logic for signing in. We would like a non-authenticated user to be redirected to the login page. Likewise, when a user logs in, they should be directed to home.
Creating a User
Creating a sign-up page for this tutorial would be superfluous- it wouldn’t reveal anymore of the strategy involved in creating a Parse-Vue app. It would mostly repeat the login component’s UI (with different input fields), and use the Parse.User.signUp method rather than Parse.User.logIn. Feel free to drop me a note if you can’t figure out how to do this. In future tutorials, I will likely touch on it.
We’re going to use the Parse Admin panel to manually create a couple of users. If you used Back4App to provision a Parse Server as detailed above, then head over to your app’s dashboard. Should you be running a local Parse Server, make sure to integrate the Parse Dashboard library. If you localhosters are lost, scroll down through the parse-dashboard README to the second example under Running as express middleware .
Now that you’ve pulled up your dashboard, select “User” on the left. Click the “Add Row” button right above the table. Fill out the email and username cells to your email, enter a password in the password cell (it will be immediately hashed), and if there is an “emailVerified” column, toggle that cell to be “ON” or true. You should now see a new row with the brand new user.
Create two users, each with its own email / username- we’ll need two users for this application
Logging in with Parse
Here’s where our application couples Parse and Vue. The following is the behaviour we want:
- When a user presses login, make sure both a username and password are entered
- If they are not, alert the user and quit
- Otherwise, use Parse API to attempt login.
- On success redirect the User to the homepage
- On failure, alert the User so.
- Show a load indicator (preferably a GIF that appears in motion) after a logIn request is sent, but before a response is received
- Use a more presentable alert technique (like Bootstrap’s alert component https://getbootstrap.com/docs/4.1/components/alerts/)
To accomplish this, we’ll make use of the Vue event feature and Vue Form Input Bindings.
Here’s what that entails: (feel free to skip to the code underneath these steps)
- In your login component declaration, add a data property. Per Vue’s Component API, data maps to a function that should return an object with attributes that the template can bind to. Add the properties ‘email’ and ‘password’, each mapped to the empty string.
- In the template, bind the username and password inputs to the corresponding data properties. Vue uses two-way binding, which means that the variables in the component update automatically with fresh input.
- Now add a methods property to the login component. It should map to an object which will hold references to methods. Our method will be “login”:
- In the template, add a v-on:click attribute assigned to the login method.
- Add logic in the login method that tries to sign-in with Parse, only after confirming that email and password are not empty.
That gives us the following login-component:
const LoginComponent = Vue.component('login-component', {
  template:
    '<div class="signin-wrapper text-center"> \
    <form class="form-signin"> \
      <h1 class="h3 mb-3 font-weight-normal">Please sign in</h1> \
      <label for="inputEmail" class="sr-only">Email address</label> \
      <input v-model="email" type="email" id="inputEmail" class="form-control" placeholder="Email address" required="" autofocus=""> \
      <label for="inputPassword" class="sr-only">Password</label> \
      <input  v-model="password" type="password" id="inputPassword" class="form-control" placeholder="Password" required=""> \
      <button v-on:click="login" class="btn btn-lg btn-primary btn-block" type="button">Sign in</button> \
      <p class="mt-5 mb-3 text-muted">© 2017-2018</p> \
    </form> \
  </div>',
  data: function () {
    return {
      email: '',
      password: '',
    }
  },
  methods: {
    login() {
      if (this.email.length === 0) {
        alert('Please enter an email')
        return
      }
      if (this.password.length === 0) {
        alert('Please enter a password')
        return
      }

      Parse.User.logIn(this.email, this.password)
        .then(() => {
          // Used an arrow function here because I
          // want to access 'this' which is overridden in
          // a conventional function
          this.$router.replace('/')
        })
        .catch(function (e) {
          alert('Error logging in! ' + e.message)
        })
    },
  },
})
Bear with me! We’re almost there.
Step 8: Authorization
You can find the step 8/9 completed source code here.
Before we test the logging in functionality, I want to add one snippet to the home component. The following will redirect to the login page if no user is logged in. It uses the “mounted” Vue lifecycle hook. For all intents and purposes, this function is triggered every time the component is shown.
The home component should look like the following:
const HomeComponent = Vue.component('home-component', {
  template:
    '<div> \
  <h1> Hello World! </h1> \
  </div>',
  mounted: function () {
    if (!Parse.User.current()) {
      this.$router.replace('/login')
    }
  },
})
This is pretty self explanatory. If a user is not logged in, per Parse’s API, redirect to the homepage.
Here’s what your code should look like now:
js/app.js:
// Your corresponding keys
Parse.initialize('YOUR_APP_ID', 'YOUR_JAVASCRIPT_KEY')

// For back4app applications, this url is
// 'https://parseapi.back4app.com'
Parse.serverURL = 'YOUR_SERVER_URL'

const LoginComponent = Vue.component('login-component', {
  template:
    '<div class="signin-wrapper text-center"> \
    <form class="form-signin"> \
      <h1 class="h3 mb-3 font-weight-normal">Please sign in</h1> \
      <label for="inputEmail" class="sr-only">Email address</label> \
      <input v-model="email" type="email" id="inputEmail" class="form-control" placeholder="Email address" required="" autofocus=""> \
      <label for="inputPassword" class="sr-only">Password</label> \
      <input  v-model="password" type="password" id="inputPassword" class="form-control" placeholder="Password" required=""> \
      <button v-on:click="login" class="btn btn-lg btn-primary btn-block" type="button">Sign in</button> \
      <p class="mt-5 mb-3 text-muted">© 2017-2018</p> \
    </form> \
  </div>',
  data: function () {
    return {
      email: '',
      password: '',
    }
  },
  methods: {
    login() {
      if (this.email.length === 0) {
        alert('Please enter an email')
        return
      }
      if (this.password.length === 0) {
        alert('Please enter a password')
        return
      }

      Parse.User.logIn(this.email, this.password)
        .then(() => {
          // Used an arrow function here because I
          // want to access 'this' which is overridden in
          // a conventional function
          this.$router.replace('/')
        })
        .catch(function (e) {
          alert('Error logging in! ' + e.message)
        })
    },
  },
})

const HomeComponent = Vue.component('home-component', {
  template:
    '<div> \
  <h1> Hello World! </h1> \
  </div>',
  mounted: function () {
    if (!Parse.User.current()) {
      this.$router.replace('/login')
    }
  },
})

const app = new Vue({
  router,
}).$mount('#app')
index.html:
<!DOCTYPE html>
<html>
  <head>
    <meta charset="UTF-8" />
    <meta name="viewport" content="width=device-width,initial-scale=1" />
    <title>My Application</title>
    <link
      rel="stylesheet"
      href="https://stackpath.bootstrapcdn.com/bootstrap/4.1.3/css/bootstrap.min.css"
      integrity="sha384-MCw98/SFnGE8fJT3GXwEOngsV7Zt27NXFoaoApmYm81iuXoPkFOJwJ8ERdknLPMO"
      crossorigin="anonymous"
    />
    <link rel="stylesheet" href="css/signin.css" />
  </head>

  <body>
    <div id="app">
      <router-view></router-view>
    </div>

    <script src="https://cdn.jsdelivr.net/npm/vue/dist/vue.js"></script>
    <script src="https://cdnjs.cloudflare.com/ajax/libs/parse/2.0.1/parse.min.js"></script>
    <script src="https://unpkg.com/vue-router/dist/vue-router.js"></script>
    <script src="js/app.js"></script>
  </body>
</html>
Since we are making HTTP requests (the Parse SDK does for us when we call the logIn method), we must run this app from a server rather than opening the markup from the browser. As mentioned in the #prerequisites, I have chosen to use the php dev server. Other options are listed in that section.
$ # serve the code on port 3100
$ php -S localhost:3100
Now navigate to your localhost: http://localhost:3100 once you see the server has started. You should be taken to the login page as no one as logged in.
Test the following:
- - Try to navigate directly to the home page, by manually setting the URL to end in / rather than /login. You should be brought back to the login page
- - Try to login without filling out both fields -> you should receive an alert message
- - Try to login with an invalid password -> you should be informed that your password is invalid, or something similar
- - Finally, login with the user you created in the Parse Dashboard (#Step7). Confirm that you are brought to the home page.
Step 9: Parse Access Control
You can find the step 8/9 completed source code here.
It’s great to protect routes on the frontend. But its utility is in UX rather than security. To secure our app, we’ll actually have the Parse Server block requests from users who aren’t authenticated.
To better demonstrate, I’ve modified the home component. It now tracks “Todos”, that can be created and deleted. It also features a logout button which logs out on Parse and redirects to the login page. It’s extremely rudimentary, but at least involves data manipulation and will serve our purpose.
If you haven’t already, remove the router-links from your index.html, leaving just the router-view. Then replace your home-component with the following:
const HomeComponent = Vue.component('home-component', {
template:
"<div> \
<button class='btn btn-secondary m-2' v-on:click='logout'> Logout </button> \
<div class='container'>\
<input style='max-width: 500px;' class='form-control mx-auto' type='text' v-model='newTodo' v-on:keyup.enter='addTodo'> \
<div style='max-width: 500px;' class='card mx-auto' v-for='todo in todos'> \
<div class='card-body'> \
<button v-on:click='deleteTodo(todo)' type='button' class='close'> \
<span>×</span> \
</button> \
<p> {{todo.get('text')}} </p> \
</div> \
</div> \
</div> \
</div>",
mounted: function () {
if (!Parse.User.current()) {
this.$router.replace('/login')
return
}
this.fetchTodos()
},
data: function () {
return {
todos: [],
newTodo: '',
}
},
methods: {
logout() {
Parse.User.logOut()
.catch(function (e) {})
.then(() => {
this.$router.replace('/login')
})
},
fetchTodos() {
new Parse.Query('Todo')
.descending('createdAt')
.find()
.then((todos) => {
this.todos = todos
})
},
addTodo() {
if (!this.newTodo || this.newTodo.length === 0) return
var todoParseObject = new Parse.Object('Todo', {
text: this.newTodo,
})
todoParseObject
.save()
.then((newTodo) => {
this.todos = [newTodo].concat(this.todos)
this.newTodo = ''
})
.catch(function (e) {
alert('Error saving todo! ' + e.message)
})
},
deleteTodo(todo) {
todo
.destroy()
.then(() => {
this.fetchTodos()
})
.catch(function (e) {
alert('Error destroying todo! ' + e.message)
})
},
},
})Reload your browser and confirm that you can logout, login, add, and delete todos.
Great! The current functionality allows any user to delete any todo, regardless of who created it. What we want is to allow anyone to read any todo, but only allow the creator to delete it.
That is, a todo should have:
- - Public read access
- - Write access restricted to creator
/ addTodo method of the HomeComponent.
// Rest of the code found on the repo: https://github.com/considine/parse-vue-starter/blob/master/js/app.js
addTodo() {
    if (!this.newTodo || this.newTodo.length === 0) return;

    var todo_acl = new Parse.ACL();
    todo_acl.setWriteAccess( Parse.User.current(), true);
    todo_acl.setPublicReadAccess( true);

    var todoParseObject = new Parse.Object("Todo", {
        "text": this.newTodo
    });
    todoParseObject.setACL(todo_acl);
    todoParseObject.save()
    .then((newTodo) => {
        this.todos = [newTodo].concat(this.todos);
        this.newTodo = "";
    })
    .catch((function (e) {
        alert("Error saving todo! " + e.message);
    }))

},
With these four extra lines of code, we achieve the desired constraints for the Todo object. NOTE: For an acceptable UI, one would make sure no delete button was visible at all for other user’s Todos. We will do that shortly. For demonstrative purposes, that button will be left in so we observe the ACL in action.
Make the changes to the addTodo() function, and refresh. Remember when you created _ two _ users? That’s going to come in handy right now.
- - Login with User 1
- - Create some Todos
- - Logout
- - Login with User 2
- - Create some Todos
- - Try to delete all Todos
You will notice that:
- - Both users can see the other’s Todos (in addition to their own)
- - A user can delete his own Todos
- - A user cannot delete other Todos
This is exactly what we wanted! You can accomplish quite a bit with this type of ACL. Some cases warrant the Parse.Role class, and I encourage you to checkout that documentation. For example, say you wanted to create a special admin user that had read and write access to all Todos. In this case, you could create an admin Role, and assign a broader Access Control to the role rather than each user. Plain old ACLs are great for anytime you simply want to individually assign access permissions like we did.
The point of this guide was to achieve a lot very quickly. Server side permissions are a must in any non-trivial application with persistent data. They can often times get complex and frustrating; the painless implementation above attests to the power of this approach.
Summary
Note: Remember all code from this guide can be found on the repo.
With a little over a 100 lines of code, much of it boilerplate, we have an SPA with authentication, data persistence, routing, and access control. This will free up your brain for the more interesting parts of the development (acquiring users, scaling up), and allow you to iterate into a very polished project.
In my next guide, I will write about rapid-prototyping with Mobile Applications, another area where developers waste their time over-configuring MVPs. If I missed anything, or you have any questions, feel free to email me at jack@koptional.com and I’ll reply quickly.